General - Desktop Document Uploader
Introduction
The desktop document uploader is a tool designed to answer the general requirement to quickly and easily load documents into the IPM document libraries. It is designed as a general tool for either browsing to a document location or using traditional drag and drop techniques to load documents.
There are 2 types of document loading that can be accomplished.
- Documents that are managed in one of IPM's 3 document libraries, Drawings, Managed Documents and Organisational documents. These documents have a dedicated record IPM record for every document. These records are used to store the additional meta-data required to manage the document. The uploader will allow the creation of these records or the updating of a revision of one in either the drawings or managed documents libraries. (Operation Documents do not have revision control). Other dedicated document librarians can be added to IPM and updated using the Document Uploader however these are the 3 standard libraries.
- Documents to be filed against an existing IPM or CRM record. These are documents that although they need to be filed so they can easily be retrieved, do not require additional meta-data recorded against them and are not usually distributed as part of one of IPM's communication documents. An example of one of these documents might be photos. Photos may need to be filed either against a job or a site diary/daily report. These files do not necessarily need to be separately documented, they simply need to be stored so they can be easily retrieved. A job or a site diary may have a large number of photos associated with it and these would be accessed by going to the parent record and looking through the associated files.
Installation
The Document Uploader can be downloaded from the ipm FTP site or by clicking this URL. ftp://ftp.ipmglobal.net/ipm_document_uploader.zip
To install simply unzip the file and right mouse click on either the Setup32.exe or Setup64.exe depending on your operating system version and run as Administrator.
Once installed you will be prompted initially with the following screen
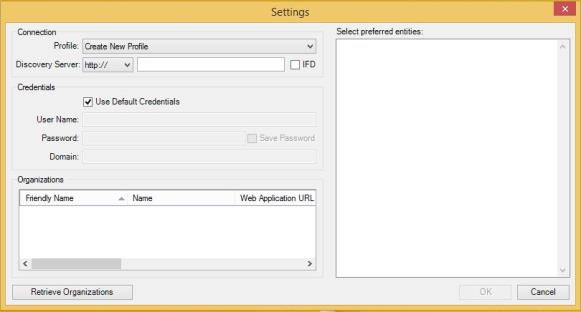
Complete the blanks. In most cases the HTTP drop down needs to be changed to HTTPS and then the CRM URL should be entered. IFD should be ticked if CRM is deployed to the internet. Record the username, password and domain and then select the target organisation.
Once the target organisation has been selected, there is a choice to made as to which entities will be filed against. This selection list can be modified at any time. Entities chosen from the list will appear in the drop-down on the main Document Uploader screen.
Uploading Documents
Documents can be uploaded by dragging files onto the application. If using standard drag and drop techniques, these can also be dragged onto the document uploader icon on the task bar. Files which are attachments to emails can also be dragged from within Outlook onto the document uploader however the Uploader must be open on the desktop in order to be an appropriate receiving target.
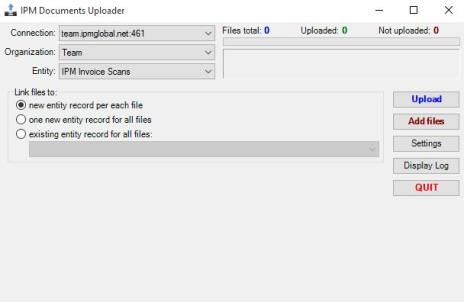
The uploader main screen provides 3 options for uploading documents:-
- New Entity per record. This option would be used where a one or a number of documents need to be uploaded into one of IPM's libraries. This would occur for example at the commencement of a new project where an entire drawing register could be created by simply dragging all of the drawing files onto the uploader. Where this option is selected, the uploader will prompt for the appropriate variables required for the IPM numeration. So for example with drawings, if using the default settings, drawings would need to be loaded by discipline as the discipline forms part of the Drawing Number. A user would be prompted for the Job and the Discipline before the upload button would be enabled.
- One new entity for all records. This would be used if a collection of files was to be added against a single new record. An example of this scenario would be in the case of a new incident where a number of documents have been collected and are to be filed against a new incident.
- Existing entity record for all files. This option is used for all general filing for example filing documents against an existing account. If this option is selected and either IPM Drawings or IPM Managed Documents are selected then an additional option will appear that allows a new revision of an existing document to be created.
When files have been dragged onto the Uploader, the Files Total register will show the total number of files dragged onto the application since the session commenced, once these files have been uploaded, the Uploaded register will be incremented. If more files are dragged onto the uploader, the Not Uploaded register is again incremented.
To browse for files, click the Add Files button.
The Display Log shows the technical activity going on and can be used to identify issues.
Cleaning Up File Names
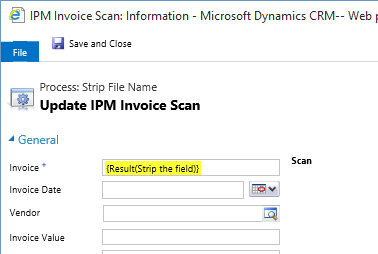
When using the document uploader, the file name may be populated with some unwanted characters. For example when uploading IPN Scanned Invoices, the file name gets populated to the Invoice Number field as "File '??????.pdf'". This is not necessarily what is wanted in the Invoice Number field so some basic manipulation of the field once filled can make it easier to work with. This manipulation can be achieved using a simple workflow as below.
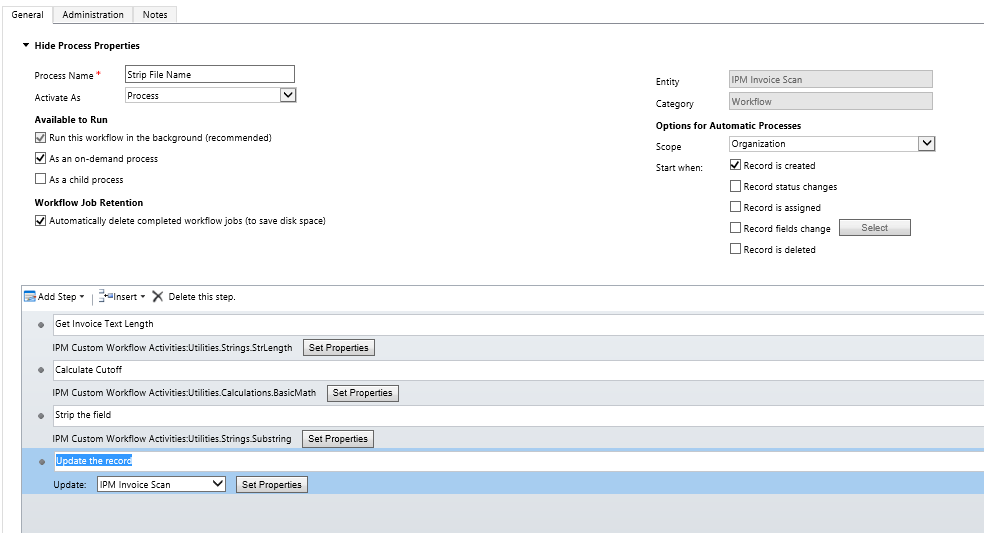
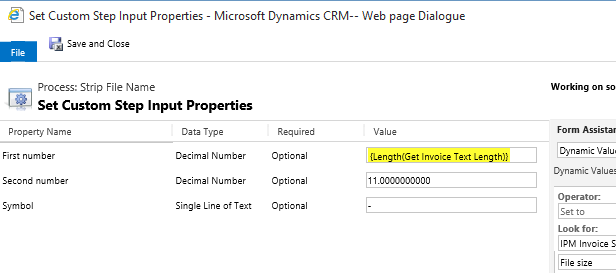
The first step uses the StrLength to get the length of the text in the target field.

The next step calculates the cutoff
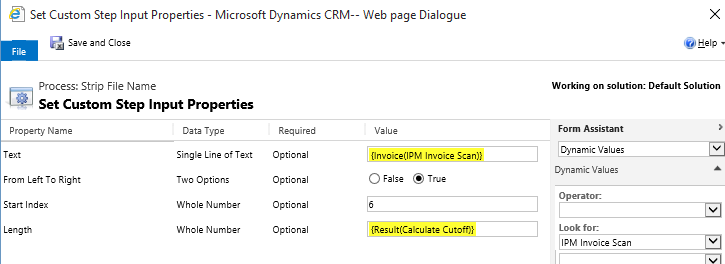
The next step strips the field
The last step simply updates the record.
