IPM DOCUMENT ROUTING
IPM Routing is available on every IPM document and lets you assign a document to a user for action, as well as see at a glance who is responsible for the document at any given time. This is also known as ‘ball in court’ functionality.
This section will show you how to add routing information to an IPM document, and also how to view routing information for a number of documents, jobs or specific resources at one time.
To add routing information to an IPM Document
There is a Routing menu in every IPM document under the Information section in the drop down menu and a grid will also be shown in the Information section to add Routing information to. The steps below will show you how to add Routing information to a drawing, but these same steps can be followed for any IPM document.
- Open the document you wish to add Routing information to
- In the drop down menu, click on Routing
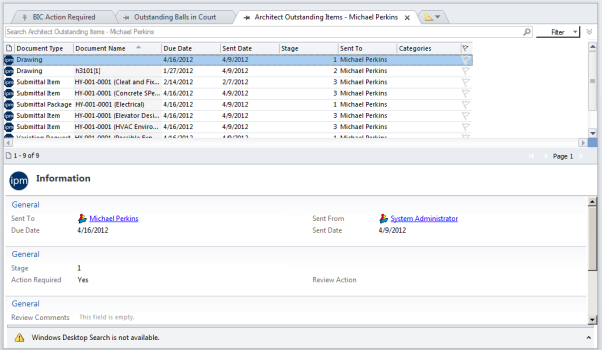
- This will take you to the grid in the Information section
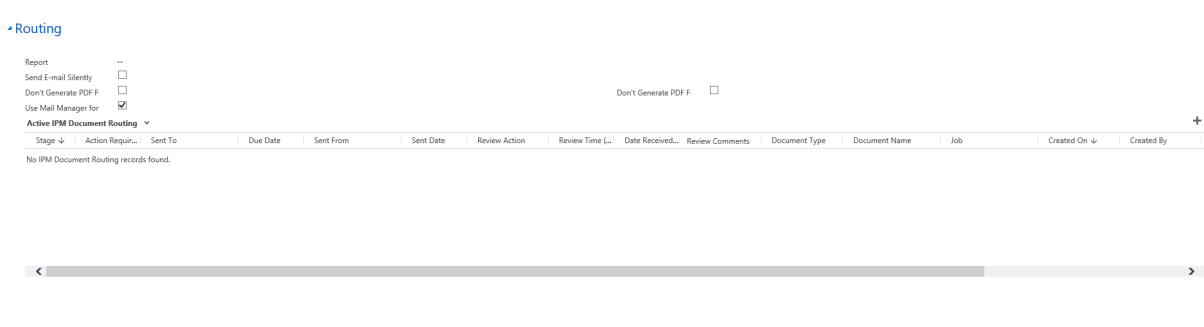
- Click inside the grid to change the ribbon menu along the top of the form
- Click on Add New IPM Document Routing in the ribbon menu
- This will bring up the New Document Routing form
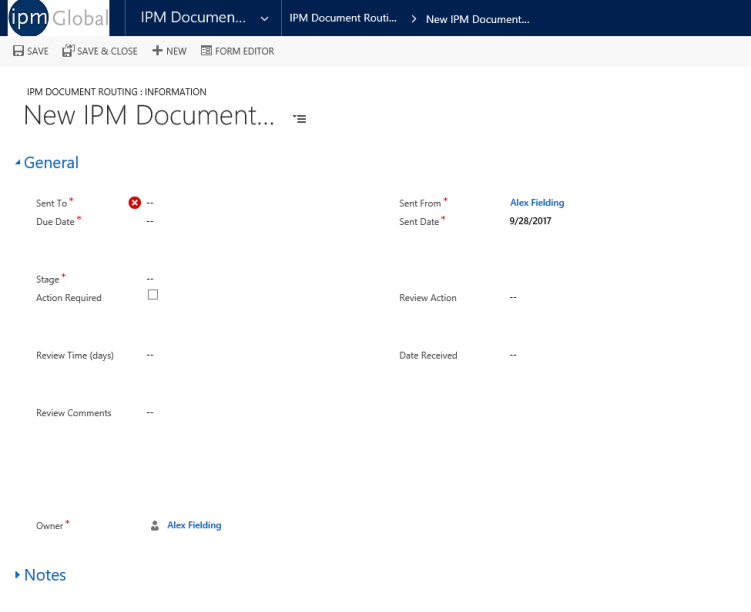
- The Sent From and Sent Date have already been prefilled according to the user who created the document and the date it was created, but these can be edited if you wish
- In the Sent To field, click on
 and select the contact from the list
 - Enter a Due Date by clicking on the calendar
- Enter the Stage as a numerical value
Note: The same Stage number can be added to more than one contact to indicate that action is required from each of those contacts at the one particular Stage
- If necessary, check the Action Required box and select the Review Action from the drop down list
- If necessary, add any Review Comments
- Once you have finished adding the required information, click Save and Close, or Save and New if you wish to add more routing information
- The information you have added will now appear in the Routing grid and you can see at a glance who’s court the ball is in on this particular document
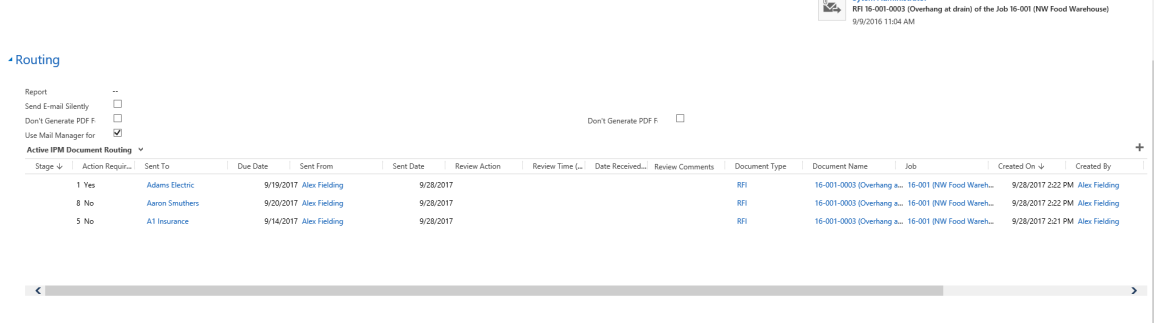
- Once the process has moved onto the next stage and the ball has moved to a new user’s court, there are two ways to update this
- First, you can manually go into the grid, open each line and check or uncheck the Action Required box as necessary
- The second option is to set up a workflow that automatically updates the Action Required box on each line when a user updates the document
- In order to alert users as to when the ball is in their court, a workflow can be set up to trigger a notification for the user in the next stage once the previous stage has been completed. (For more information on Workflows, see Chapter 2, 2.3 or consult your Microsoft Dynamics CRM 2011® user documentation)
To View Overall Routing Information
Use the following steps to view document routing for a number of different documents at once:
- In the drop down navigation menu, go to IPM Document Control > IPM Document Routing
- This will open up a grid with all of the document routing for any documents the user has access to
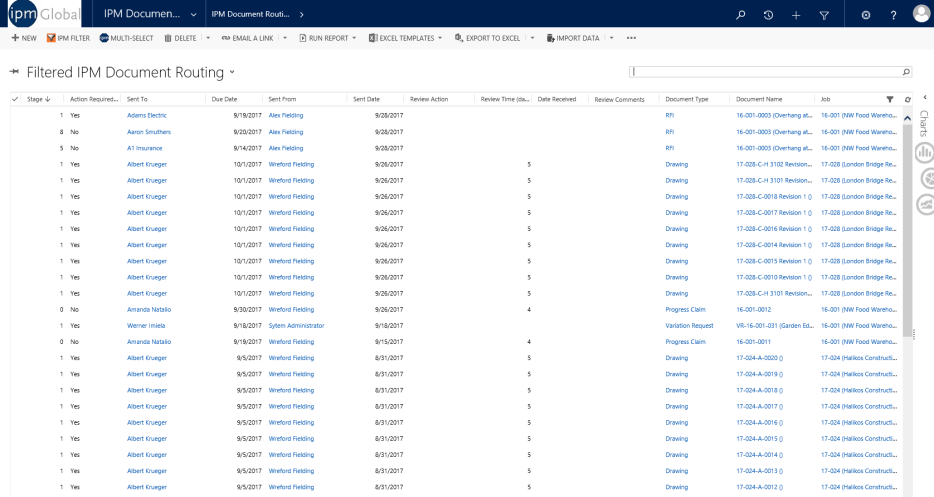
- You can add document routing directly from this view by clicking on Multi-Select and filling in the same information for each contact as we did in steps 8-12 above
- To view an individual line, double click on it and it will open up the IPM Document Routing form for that line
- In the document routing overview grid, you can also apply conditional formatting to change the appearance of specific lines. For example in the screen shot above, it has been applied to all overdue documents so they stand out in red (for more information on conditional formatting, consult your Microsoft Dynamics CRM 2011® user documentation)
- In this section, you can also add your own custom views to show you only particular information in the grid, for example all outstanding balls in court or one user’s ball in court documents (for more information on adding system views, consult your Microsoft Dynamics CRM 2011® user documentation)
- To do this, click
 across the top of the grid and select the view you wish to see
 - The view will now be pinned to the top of the grid and you can move between all the different views pinned here by clicking on them