IPM Document Uploader
The IPM Document Uploader is a desktop tool designed to make it simple to upload documents into the IPM Document Libraries. It must be separately installed on each workstation. This tool also provides functionality to drag items from Outlook and load them directly into IPM.
The tool has some OCR functionality for certain document types. IPM Drawings, IPM Invoice Scans, IPM Managed Documents and IPM Operational Documents can be OCR'd prior to loading. This allows some of the metadata to be scraped or maintained before the document is loaded, limiting the maintenance required directly on the IPM records. The OCR functionality is only available for new records although revisions to Drawings can also be loaded. The OCR functionality will only work on PC Desktop environments and is not available on Server or Terminal Server environments.
Settings
Install the uploader onto your workstation. It doesn’t add an icon to the desktop automatically so you will need to find the executable in C:\Program Files\IPM Global\IPM Document Uploader and right click on the IPMGlobal.CRM.IPM.DocumentUploader.exe and add to Start or Taskbar.
Once installed the uploader needs to be configured to connect to the IPM Database. The application should start on the settings page when started for the first time. If this doesn't happen simply click the settings button to go to the settings page.
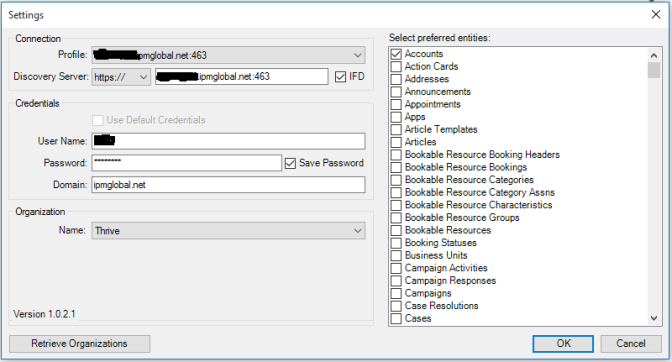
Complete the URL making sure you select https:// and IFD if you are IFD deployed.
Complete the user name , password and domain and check the Save Password check box. Click the Retrieve Organisations button.
Once you are connected to an organisation, select the entities that you would like to load documents for, you select several however don't select more than you actually need as you can add later. Once completed, click OK.
Basic Operation
The basic operation for loading documents is very simple. Simply drag documents to be filed onto the application. You can use standard Drag and Drop processes or you can browse to a folder and select multiple documents if required. You can also drag attachments from Outlook directly onto the Uploader.
From the entities list choose the Entity you want to load documents for. If you choose either the first or second selection from the radio buttons, if the entity has specific requirements for new items, you will be prompted to complete those requirements. Mandatory requirements are highlighted with an asterisk. If you choose the third option, you will be prompted to nominate the record to file against. Once the requirements have been completed, simply click the upload button. If there are any issues during the upload, these will be detailed in the log, which can be accessed using the "Display Log" button.

To explain the 3 options please review the following:-
New entity record per each file - This option will create a new record of the type nominated by the entity drop-down at the top of the application for each file loaded. A good example of this sort of upload would be drawings. If you want each drawing to be represented by a separate record, select this option.
One new entity record for all files. This option will create a single new record for all the files loaded. You might use this option to a number of photos and other documents to an incident to create the new incident record.
Existing entity record for all files. This option requires the selection of a record to become the owner of all the files being uploaded. An example of this might be loading a number of photos against a Job.
OCR Operation
Certain Entities have been enabled to use a new OCR function before uploading. These entities include IPM Drawings, IPM Scanned Invoices, IPM Managed Documents and IPM Operational Documents. If any of these are selected from the entities list and the "Link files to" option is set to New Entity Record then the OCR button can be accessed. Once clicked a table of the documents waiting for upload is displayed. This table can simply be maintained manually or any text identified by the OCR process can be updated in the table simply by clicking on the text.
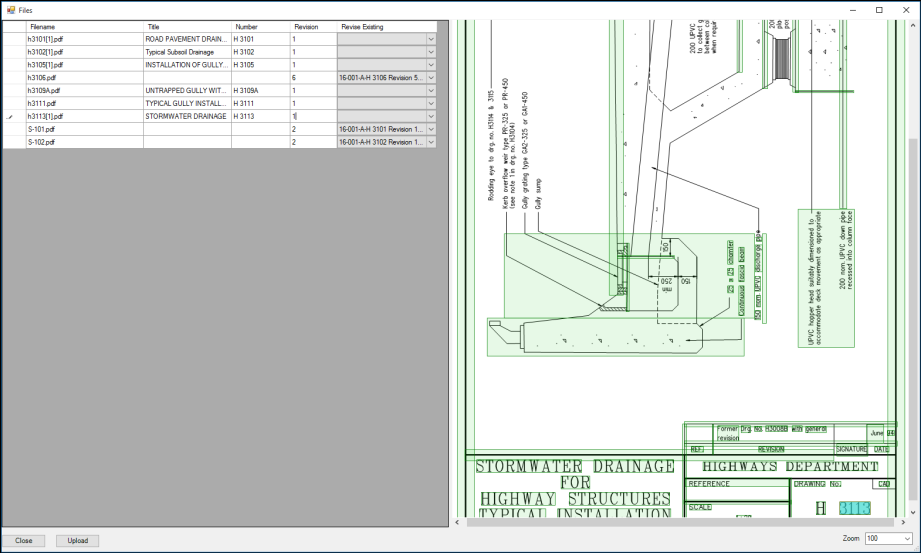
If the entity supports revisions, a revision can be selected instead.